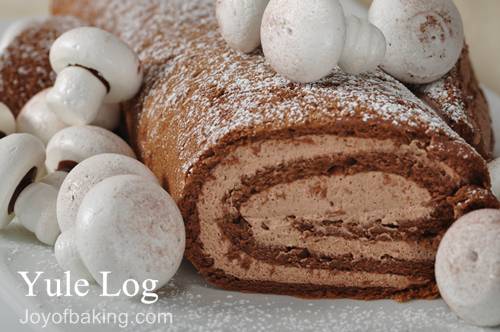
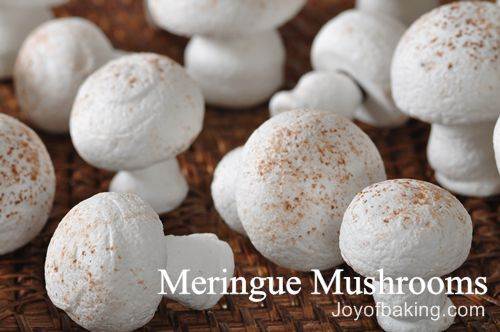
This Yule Log or Bûche de Noël (BOOSH duh noh-EHL) is a unique way to carry on the tradition of celebrating Christmas and the winter solstice by burning a wooden log in the hearth. It was an innovative French pastry chef (in the late 1800s) who came up with the idea of replacing the real 'yule' log with a cake that was log shaped. While there are many recipes for this Christmas dessert, I like to use this deliciously light and moist flourless chocolate sponge cake, that is filled with chocolate whipped cream, rolled into a cylinder, and dusted with powdered sugar (to simulate snow). I also like to pile lots of sweet homemade meringue mushrooms on top and around the Yule Log for everyone to nibble on.
Now, this chocolate sponge cake is a little different from most in that it does not contain flour. The recipe is one I adapted from Rose Levy Beranbaum's cookbook The Cake Bible and it is a very light and moist cake, more like a baked mousse, that seems to just melt in your mouth. Rose Levy Beranbaum describes it as "more a flourless souffle than a cake". It is baked in a sheet pan, so you do not have to worry about it deflating and also don't worry if the sponge cracks when you roll the cake around the filling as this is normal.
The chocolate flavor in this cake comes from melted semi- sweet or bittersweet chocolate which goes very nicely with the light textured chocolate whipped cream filling. While not necessary, everyone seems to enjoy the homemade meringue mushrooms which, happily, can be made several weeks in advance of Christmas.
Bo Friberg in his book The Professional Pastry Chef gives us a little history on the Yule Log. He tells us that it was a tradition, dating from pre-Christian times, to honor the God Thor and to celebrate the winter solstice with a building of a bonfire. The story goes, that as Christmas came to replace the Winter Solstice celebrations, France carried on the tradition for a 'yule' log by cutting down a tree each year and then placing it in the fireplace so the heat from the log could be used to prepare the Christmas Eve midnight supper.
The ashes from this 'yule' log were believed to hold magical and medicinal powers that would ward off the evil spirits in the coming year. The tradition of substituting a real 'yule' log with a dessert 'Yule' Log was probably started when homes were built without fireplaces, thus not being able to burn a real 'yule' log.
Yule Log Recipe:
1/4 cup (50 grams) plus 2 tablespoons (28 grams) granulated white sugar
6 large eggs, separated
1/2 teaspoon pure vanilla extract
4 ounces (112 grams) bittersweet or semisweet chocolate, chopped in small pieces
3/4 teaspoon cream of tartar
Chocolate Whipped Cream:
1 cup (240 ml) heavy whipping cream(contains 35-40% butterfat)
1/2 teaspoon pure vanillaextract
3 tablespoon (40 grams) granulated white sugar
1 1/2 tablespoons unsweetened cocoa powder
Garnish: (optional)
DIRECTIONS:
Yule Log: Preheat oven to 350 degrees F (180 degrees C) and place the oven rack in the center of the oven. Butter, or spray with a non stick vegetable spray, a 17 x 12 inch (43x30 cm) baking pan. Line the pan with parchment paper and then butter and flour the parchment paper.
While the eggs are still cold, separate the eggs, placing the whites in one bowl and the yolks in another. Cover and bring to room temperature before using (about 30 minutes). Meanwhile melt the chocolate in a heatproof bowl placed over a saucepan of simmering water. Remove from heat and cool.
In the bowl of your electric mixer (or with a hand mixer) place the egg yolks and 1/4 cup of sugar and beat until light and fluffy (about five minutes). (When you slowly raise the beaters, the batter will fall back into the bowl in a slow ribbon.) Beat in the vanilla extract. Scrape down sides of bowl. Add the melted chocolate andbeat only to combine.
In a clean mixing bowl, with the whisk attachment, beat the egg whites until foamy. Add the cream of tartar and beat at medium-high speed until soft peaks form. Gradually beat in the remaining 2 tablespoons sugar until stiff peaks form.
Gently fold a small amount of the egg whites into the egg yolk mixture using a rubber spatula or whisk. Fold in the remaining whites just until incorporated. Don't over mix or the batter will deflate. Spread the batter evenly into the prepared pan. Bake until the cake is puffed, has lost its shine, and springs back when gently pressed, about 15 -17 minutes. Remove from oven and place on wire rack to cool. Cover the cake with a clean, slightly damp towel.
Chocolate Whipped Cream: In a large mixing bowl place the whipping cream, vanilla extract, sugar, and cocoa powder and stir to combine. Cover and chill the bowl and beaters in the refrigerator for at least one hour so the cocoa powder has time to dissolve. Beat the mixture until stiff peaks form.
Once the cake has cooled, spread with the cream (set 2 tablespoons aside) and then gently roll the cake, peeling off the parchment paper as you roll (the cake may crack). Trim one end of the cake at an angle and set it aside. Then place the cake, seam side down, on your serving platter. Take the slice of reserved cake and, using the reserved whipped cream, attach it to the side of the cake. Cover and chill until serving time. Just before serving remove cake from fridge, dust with confectioners' sugar and decorate with mushrooms.
Source:


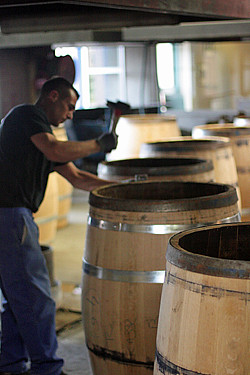
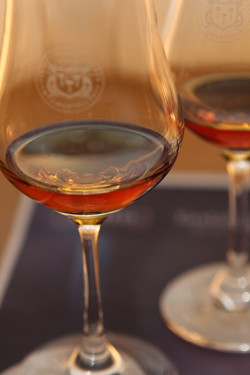
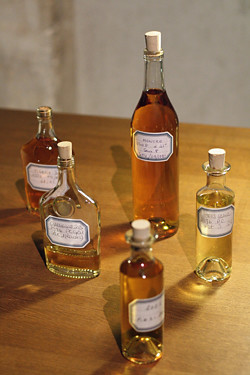
 Cognac is my favorite hard liquor. (Hence, the ongoing plight to find a perfect Sidecar here in Columbus.) Yet, I know very little about the heady elixir beyond it being a fancy brandy. I tend to view Cognac as an indulgence... like when when LUPEC meets up for 'old man drinks.' Or when we're camped out at the bar of some vintage chop house. But why? Besides price. I like to be educated about what I drink- partly because we all love a good cocktail, but mostly to direct my tours and readers toward special places and experiences (which will soon include Cognac houses).